
Add an overlay to your 360 photobooth videos
An overlay puts your artwork on top of every clip your booth makes. Here is the file you need, where to add it in the app, and why an overlay sometimes does not appear.
An overlay is a picture that sits on top of every clip from your event.
Operators use it for a couple's names, an event date, a sponsor's artwork,
or a frame around the video.
The overlay is baked into the video file. Guests get it whether they
download the clip, share it, or save it months later. It cannot be removed
afterwards, so it is worth getting the file right before the event.
Before you start: an overlay needs Pro
On the free plan your overlay is not used. Clips are rendered with the
Logibooth sample watermark instead.
This is the one thing Pro changes: whose brand is on the clips. Everything
else in Logibooth is the same on both plans.
If you upload an overlay on a free account, nothing will look broken. The
file uploads, the row shows your image, and then every clip comes out with
our watermark on it. Check your plan first.
The file you need
The app does not tell you these on screen, so keep them somewhere handy.
- A PNG with a transparent background. A JPG has no transparency, so it
will cover the whole video. - Full frame, 9:16. 1080 x 1920 works well.
- Under 10 MB.
The overlay covers the entire clip, edge to edge. Anything solid in the
middle of the image will hide the guests. Keep the middle clear and put
your artwork near the edges.
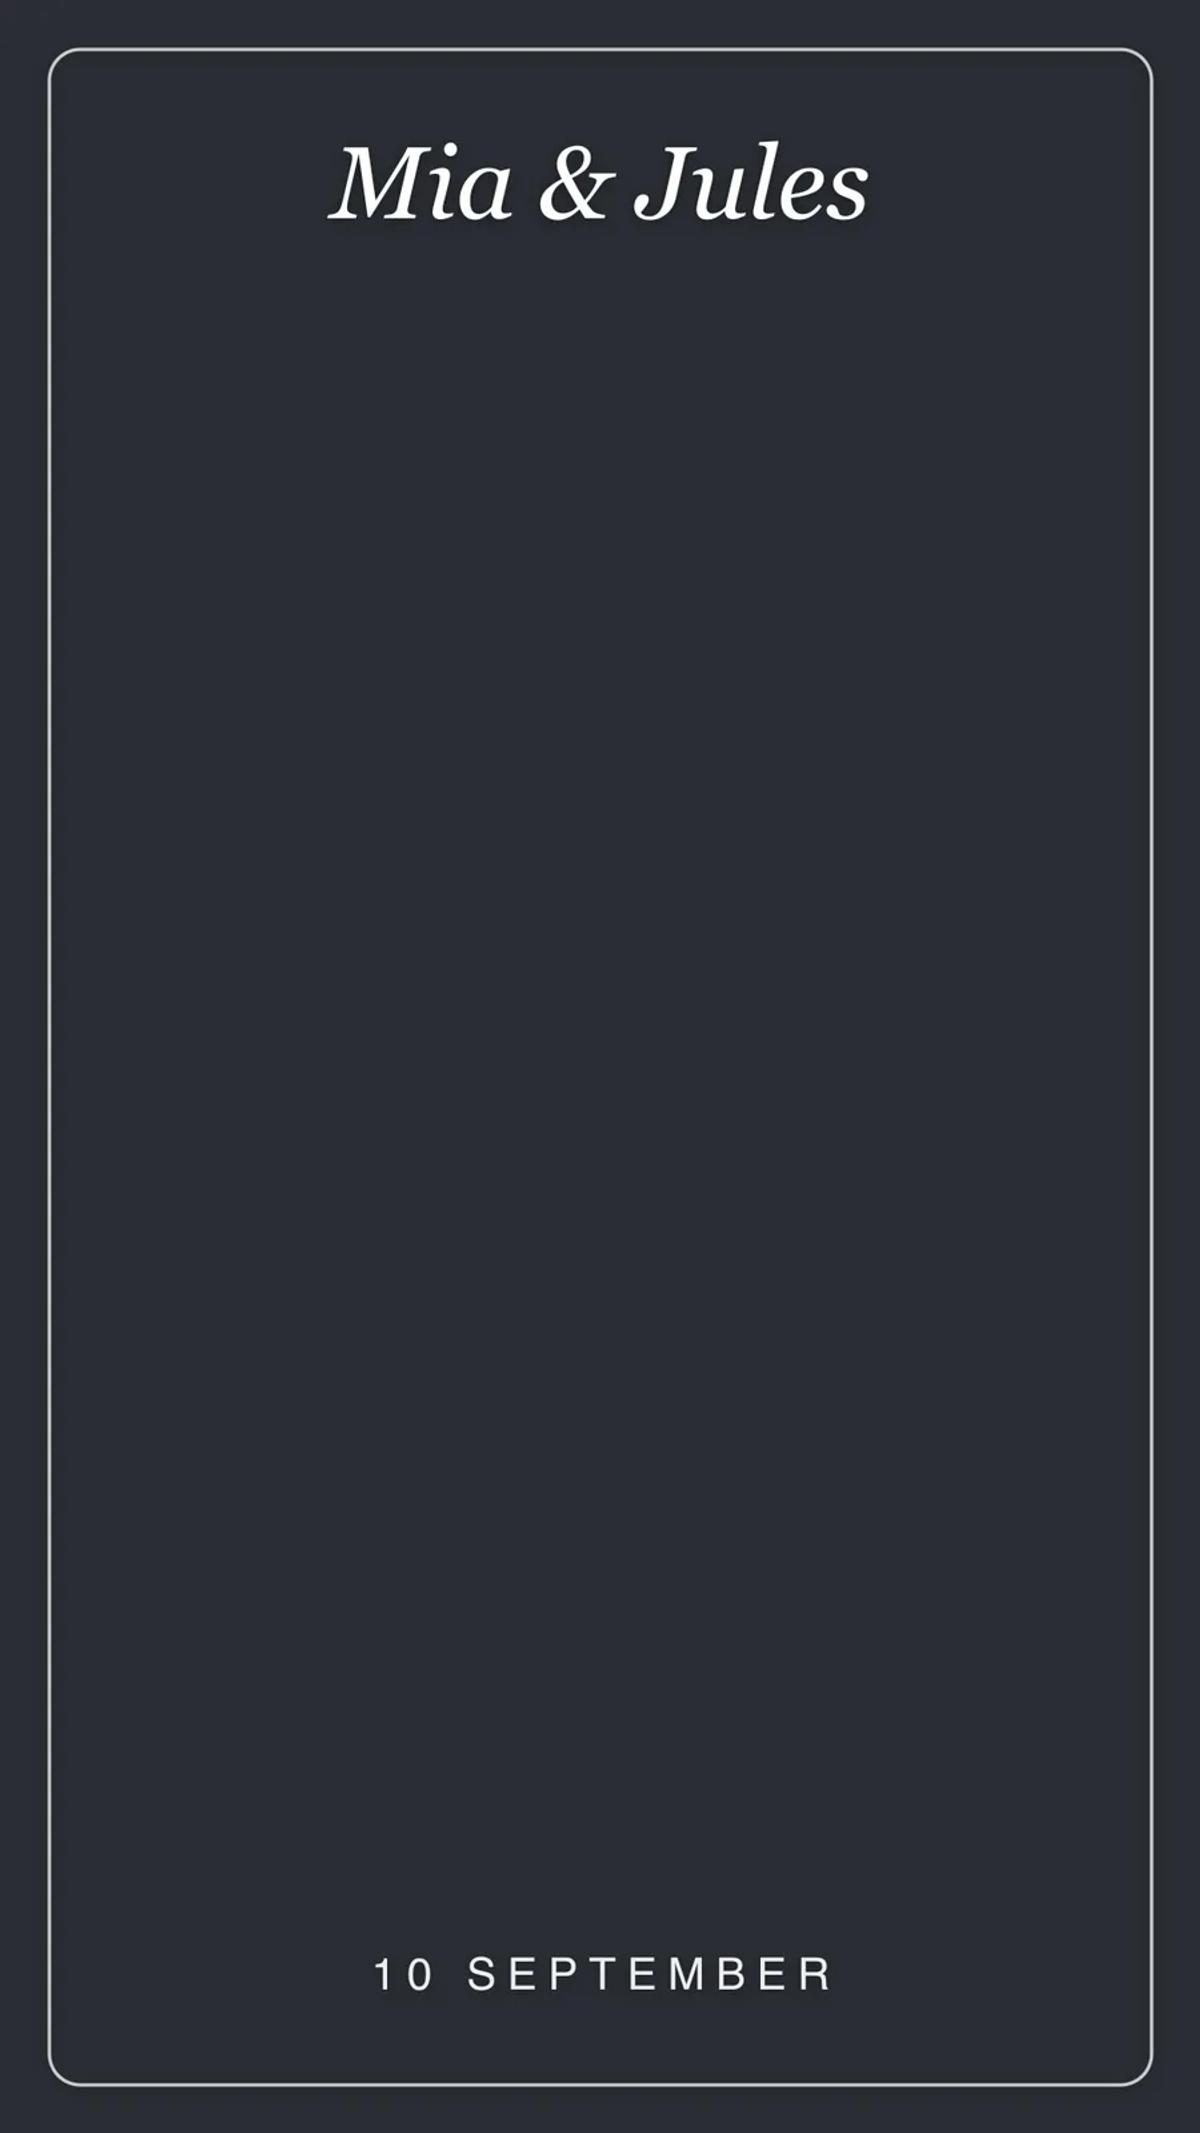
Any editor that exports a transparent PNG will do. Canva, Photoshop and
Figma all export one.
Add it to your event
- Open the app and tap Projects.
- Tap the event you want to brand.
- Tap the Branding tab.
- Under VIDEO BRANDING, tap Overlay image.
- Pick your PNG from your photo library.
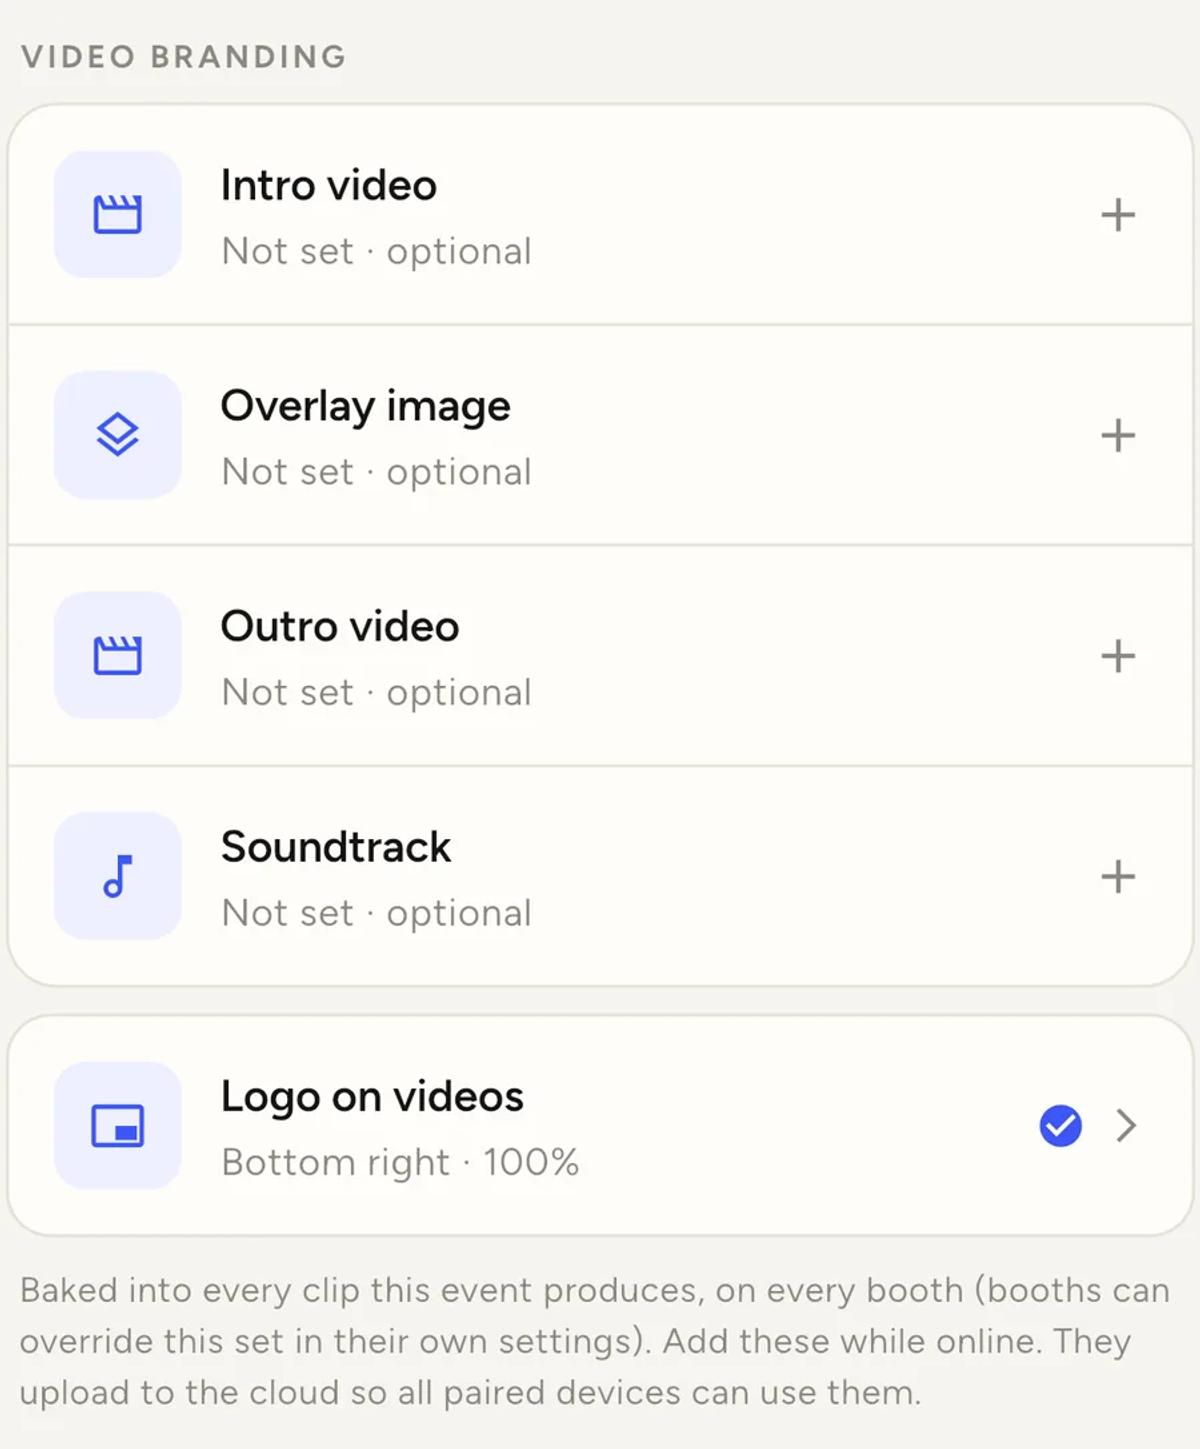
Two things surprise people here.
Your overlay may look blank in the photo picker. A transparent PNG with
white artwork is invisible against the picker's white background. Pick it
anyway. If you are not sure which file is yours, put a coloured shape in a
corner while you test.
The row shows a long file name afterwards, not your file name. Something
like image_picker_FC638AE8…. That is normal. The blue tick means it is
set.
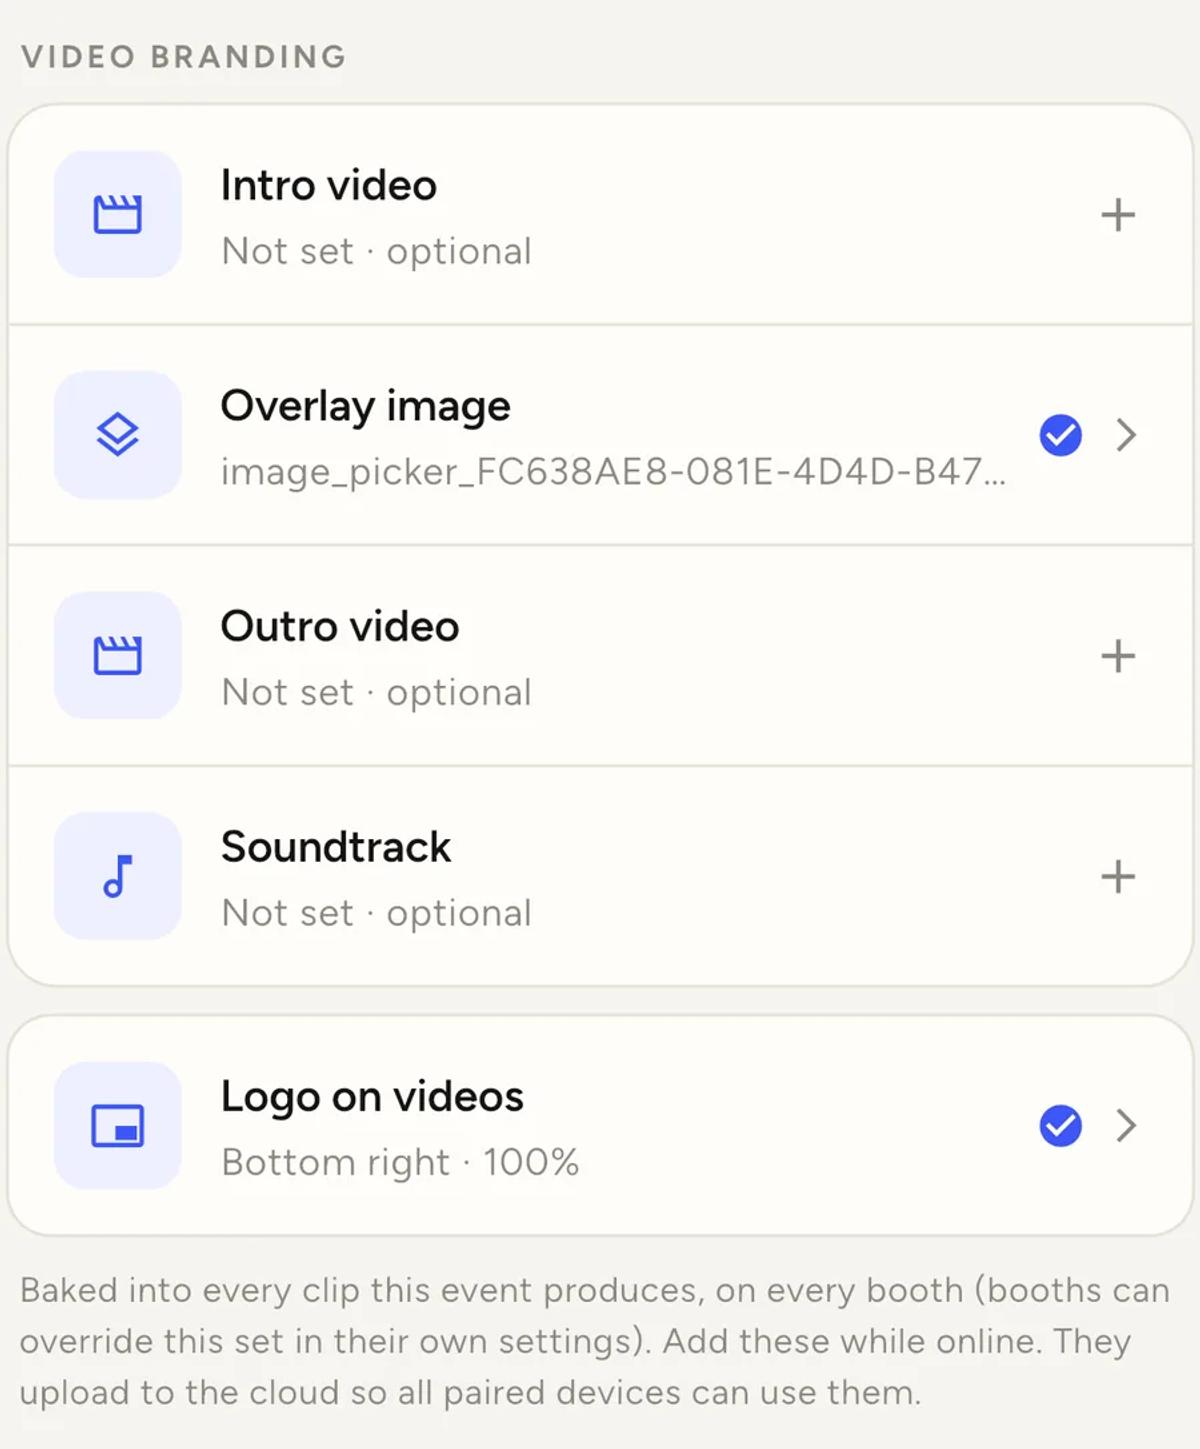
Each row only offers the file type it accepts. The overlay row opens your
photos. The intro and outro rows open your videos.
Do this while you have internet. The file uploads to the cloud so that
every paired device at your event can use it. If you add an overlay at a
venue with no connection, the other devices will not have it.
Your logo on top of the overlay
The Logo on videos row is separate from the overlay. It bakes your logo
into a corner you choose, at an opacity you choose.
You can use both at once. Logibooth merges your logo into your overlay
before rendering, because the video pipeline takes one image.
Two things have to be set or the logo is skipped without a warning:
- a corner position, chosen in Logo on videos
- a logo on the brand the event is using — your business logo, or the event
identity logo if the event has its own
If either is missing, the clip renders with the overlay only.
One overlay per event, unless a booth overrides it
The overlay you set on the Branding tab applies to every clip that event
produces, on every booth.
A booth can override it in its own settings. That is useful when you run
two booths at one venue for two different sponsors.
If your overlay does not appear
Work down this list in order.
- Check your plan. On free, the sample watermark replaces your overlay.
This is the most common cause. - Check the file is a PNG with real transparency. Open it over a
coloured background in your editor. If you cannot see through it, the
video cannot either. - Check the shape. A square or landscape image gets fitted to a 9:16
clip and will not line up. - Check the booth. If that booth has its own overlay set, it is using
that one, not the event's. - Check when you added it. Clips recorded before you added the overlay
keep whatever branding was set at the time. Baking happens once, and
finished clips are never re-rendered.