
Your first event, start to finish
Set your defaults once and every event after that starts configured. Here is the whole run, from creating the project to backing up after the night.
This is the overview. Each step links to the guide that covers it properly,
so read this once to see the shape, then go deep only where you need to.
The single most useful thing to understand: set your defaults once and
every event after that starts already configured. Your branding, guest
gates and music carry over automatically. The first event takes a while. The
tenth takes two minutes.
Do this once, not per event
Before your first job, set up the things every event inherits. They live
under Profile.
- Brand kit. Your business name and logo. Guests see this on download
pages and at the Share Station. - Guest gates. Whether you ask for a
follow,
a contact
or a review. - Music library. Upload your tracks and set a default. See
add music.
Do this properly and you will rarely touch it again.
Create the project
Tap New project on the home screen. It is two steps.
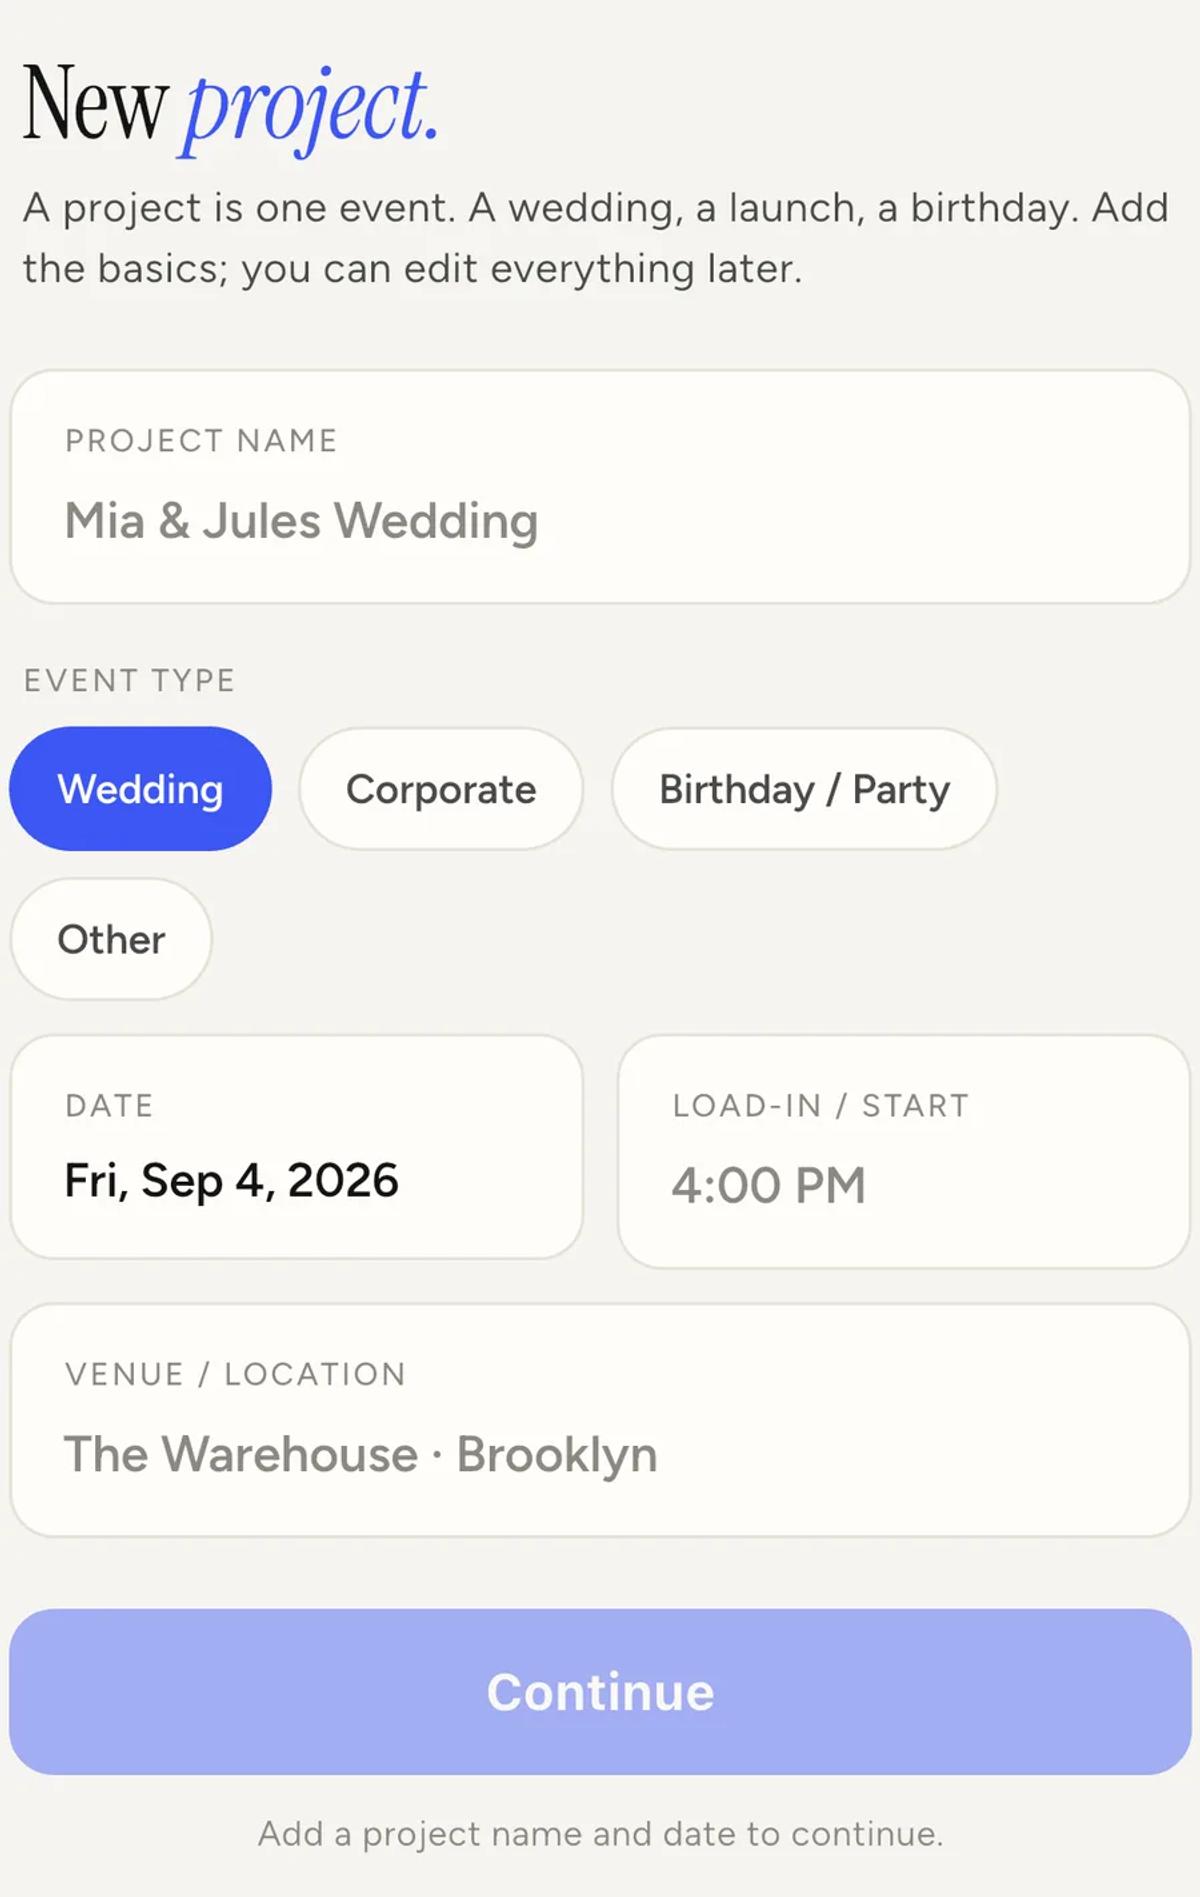
Step one is the event itself: name, type, date, load-in time and venue. Only
the name and date are needed to continue.
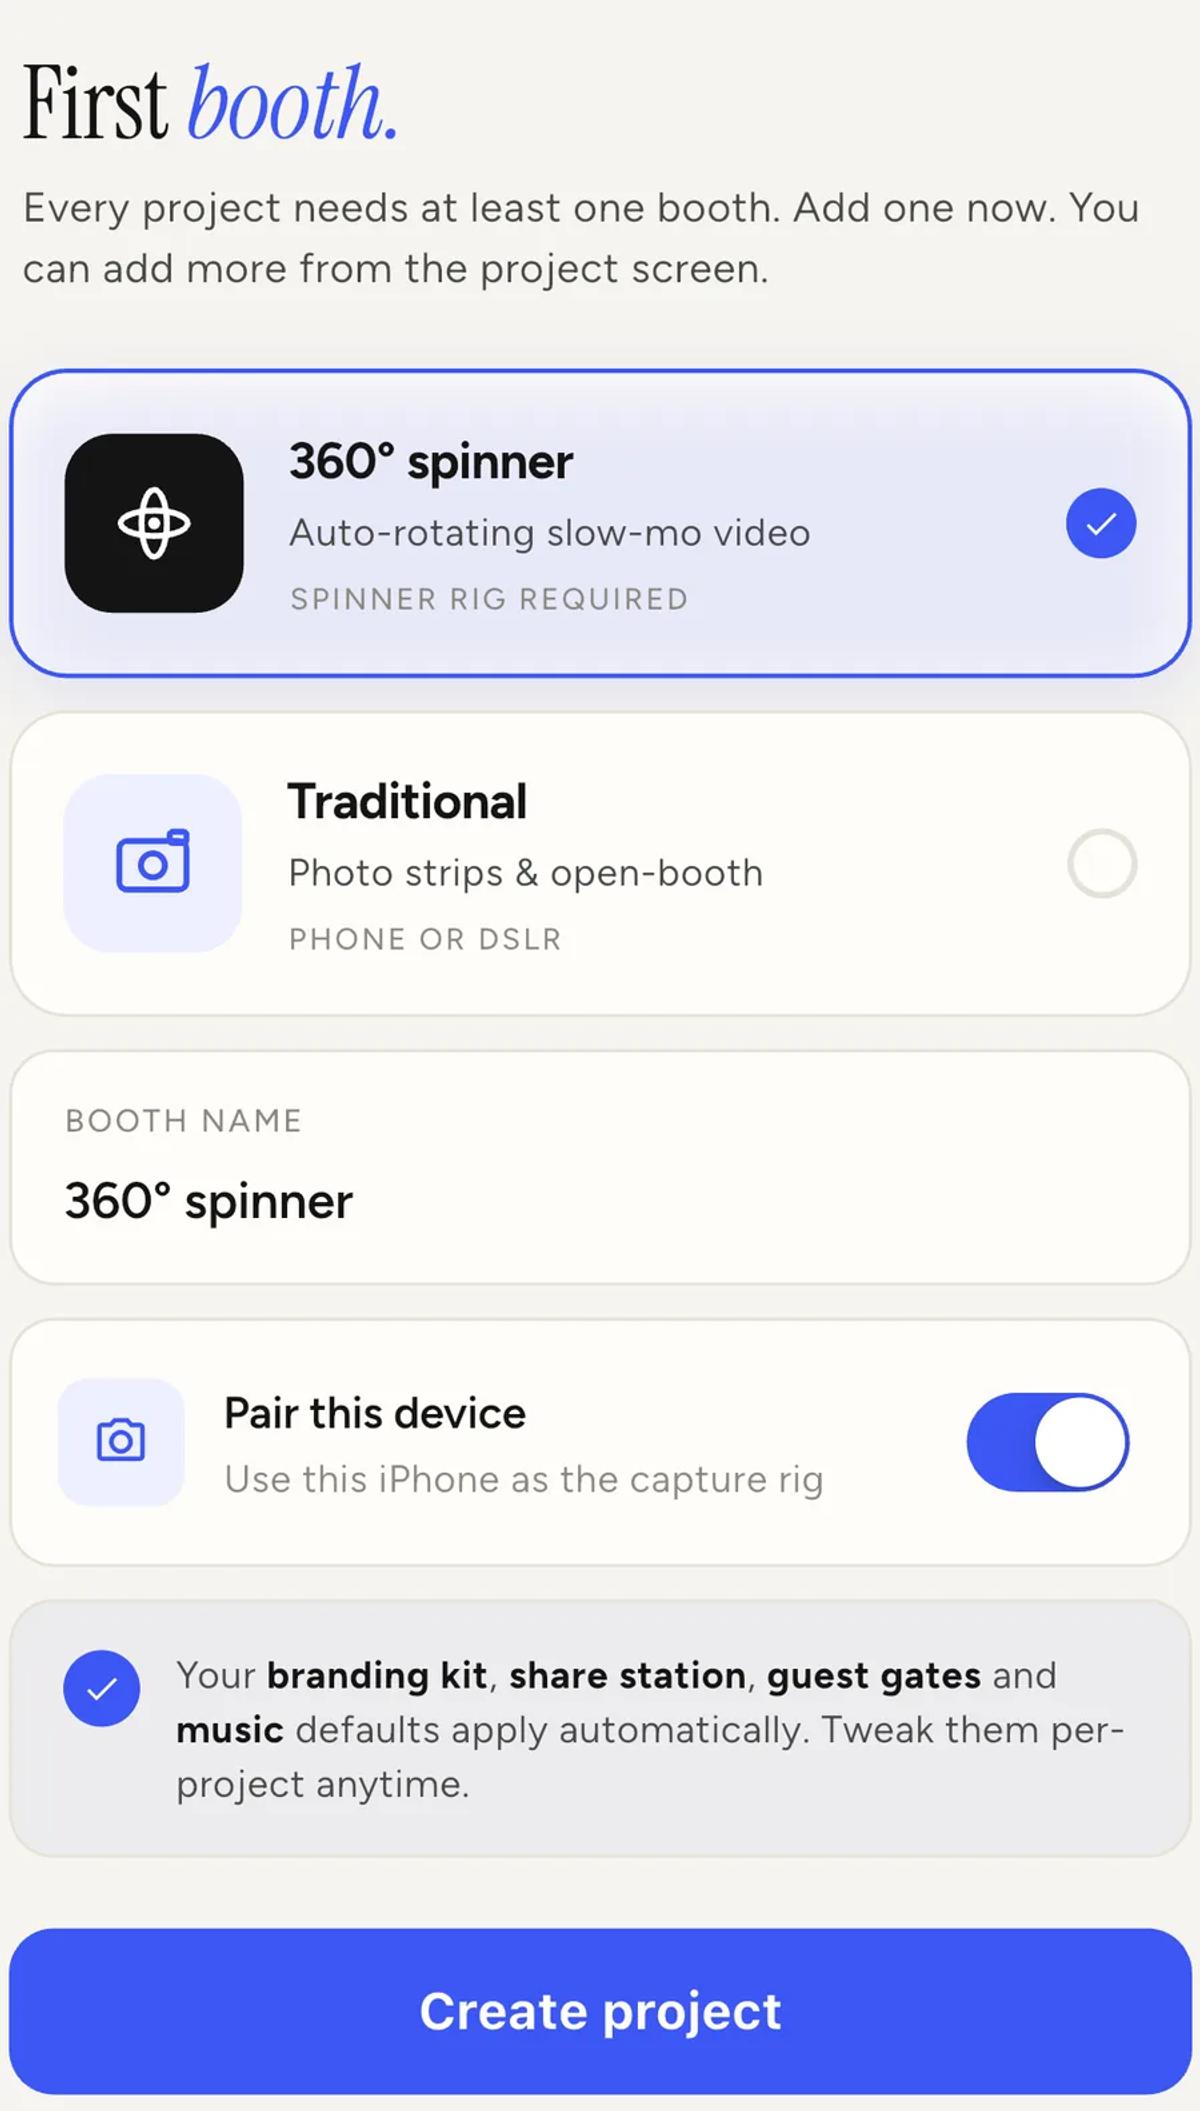
Step two adds your first booth. Choose 360 spinner for the rotating arm,
or Traditional for an open booth or photo strips. Pair this device
makes the phone in your hand the capture rig.
Note the card near the bottom: your defaults apply automatically. That is
the payoff for the setup you did once.
Brand the event
Open the event and tap Branding. Everything here is optional, and each
piece has its own guide:
- Intro video,
which plays before every clip - Overlay image,
baked over the whole clip - Outro video,
the best place for your handle - Soundtrack
Add branding while you have internet. It uploads so every paired device
can use it.
Pick an effect
On the booth, tap Effects. Nine ship with the app and you can preview
any of them on your own footage. See
choosing the right effect.
Decide how guests get their clips
This is the setting that matters most on the night. Cloud hands guests
an internet link; Local serves clips off your phone over the venue
network. If the venue has no usable signal, you want Local, and you want to
know that before you arrive.
Read Cloud or Local,
and if the venue is a known black spot, also
running an event with no internet.
Use the checklist as your own to-do list
The event screen has a Ready to roll card with three ticks.
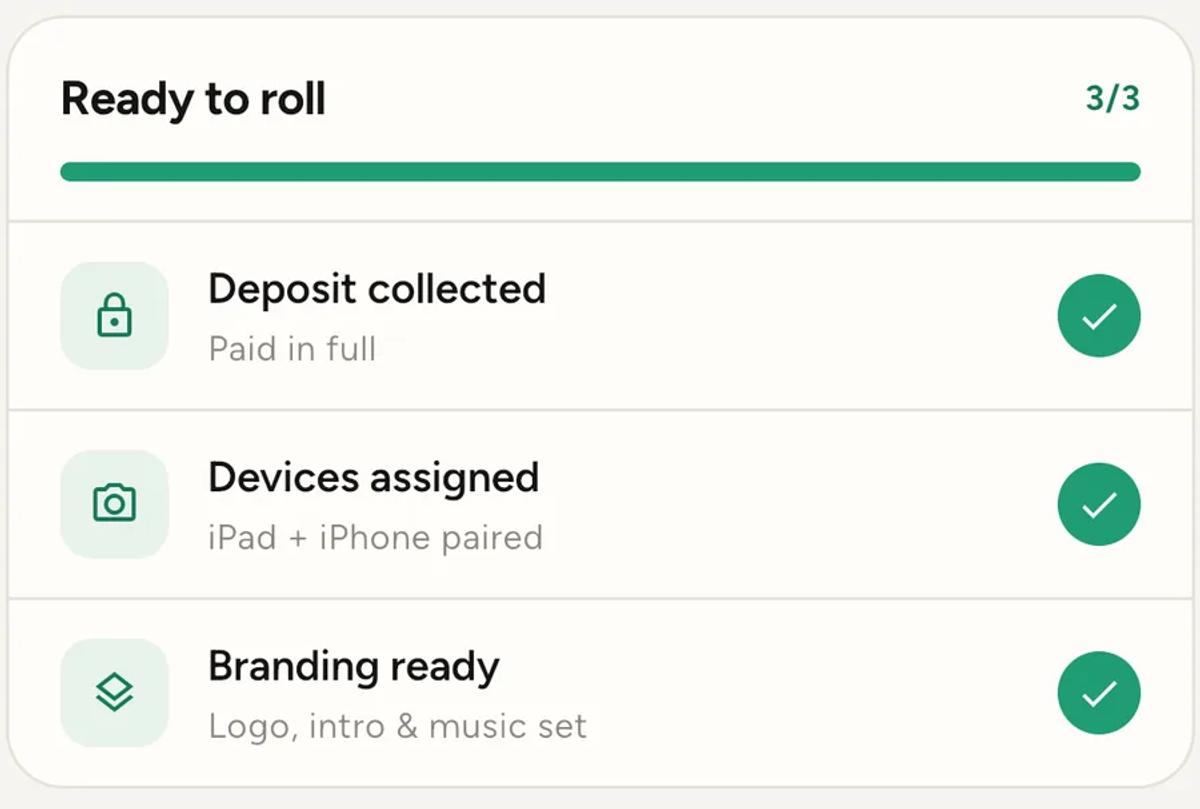
Worth knowing: you tick these yourself. The app is not verifying that a
deposit landed or that branding is complete. It is a to-do list you keep, not
a status the app calculates, so a full three out of three means only that
you said so.
Set up the Share Station
If you are running a second screen so guests can grab their own clips, see
set up the Share Station.
On a Local event the two devices also need pairing, which is covered in
when the Share Station will not pair.
On the night
Open the booth and tap Open capture. Recording is driven by the arm, not
by a button: it starts when the arm spins and stops at ten seconds.
Keep the recorder unlocked with the app open. On a Local event, sharing
pauses while the app is in the background.
Before you pack down
Two things, in this order.
Check the queue on every recording phone. Clips that failed can usually
be retried on the spot, and only from the device that recorded them. See
when a clip cannot be retried from this device.
If the event was Local, back up. Those clips are not uploaded
automatically. Open the booth and tap Upload all while you still have a
connection. Until you do, the only copy is on that phone.
The second event
Create the project, add the booth, check the delivery setting, go. Everything
else is already how you left it.
Keep reading
Add an overlay to your 360 photobooth videos
An overlay puts your artwork on top of every clip your booth makes. Here is the file you need, where to add it in the app, and why an overlay sometimes does not appear.
Read more →
Add music to your 360 photobooth videos
A soundtrack plays under every clip from your event. You can pick one track, or pick several and let each clip get a different one at random.
Read more →
Brand kit, event identity and booth overrides
Branding sits at three levels and they do not all behave the same way. Two follow your changes, one is copied once and never looks back.
Read more →